Tuesday, 12 July 2016

Debian 8 Jessie: Wireless mini PCI express Ralink RT3090sta Driver installation

Background: Linux Mint Debian running in Mate Environment

Prior to verify the model of you wireless Network Controller, it is important to ensure that Network Manager(which is default in Gnome and Mate) is running.
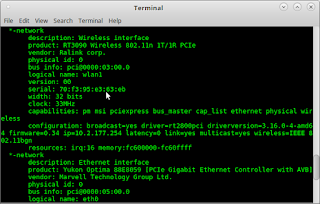


Issue command: sudo lshw -C network
Please note that *-network UNCLAIMED is shown prior to installing the required package listed below.

Ensure that your /etc/network/interfaces file is clean as mine:

source-directory /etc/network/interfaces.d
auto lo
iface lo inet loopback

The most you need to add are the three lines above.
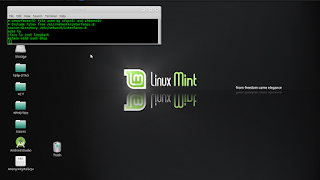


From the above the model is RT3090 Wireless 802.11n
 PCIe.

Required package:  'firmware-ralink' and 'wireless-tools' package

Install the 'firmware-ralink' driver (perhaps 'wireless-tools' too if not already installed) to provide support for RT3090 driver.

Issue command: sudo apt-get update && sudo apt-get install firmware-ralink

Important: ensure no Ralink RT28xx driver is blacklisted in /etc/modprobe.d/blacklist.conf

Reboot the PC to allow the driver to initiate.

If the driver is not loaded up after the reboot, initiate the command :

sudo modprobe rt2800pci

If the 'firmware-ralink' is not working, you can try the alternative package 'rt3090-dkms' on Ubuntu thread : http://ubuntuforums.org/showthread.php?t=1669283 .

Hopefully it works by now and you can confirm it by running the command ifconfig or lshw -C network. The 'logical name' row (lshw -C network) is an indication that your device is identified.



Follow my blog with Bloglovin

Friday, 20 May 2016

Installing ffDiaporama Development Version in Fedora 23

Preliminary
As the maintainer for ffDiaporama is not maintaining the project, i decided to try out the development version which tends to be ahead of the stable version.

 Select the Linux button from ffDiaporama Landing site (http://ffdiaporama.tuxfamily.org/?page_id=3635) .

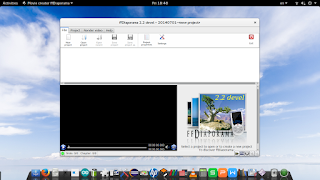
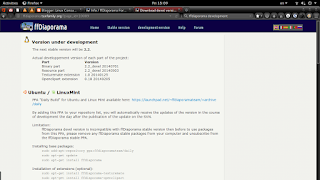
We shall see this page.


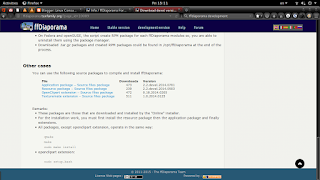
There is a script for Fedora, but i can't seem to get it to work. Hence, i downloaded the zip files found under the section "Other cases".

Download the three files, Resource package – Source files package,Application package – Source files package, Texturemate extension – Source files package.


Installing Qmake and other prequisites

 Go for Qt5


Installation prerequisites:
     sudo dnf groupinstall development-tools
     sudo dnf install gcc-c++
     sudo dnf install qt5-qtbase-devel qt5-qttools-devel qt5-qtsvg-devel qt5-qtbase qt5-qttools qt5-qtsvg qt5-qtimageformats qt5-qtmultimedia-devel qt5-qtmultimedia qt5-qtdeclarative-devel
     sudo dnf install ffmpeg ffmpeg-devel
     sudo dnf install SDL SDL-devel SDL_mixer-devel SDL_mixer
     sudo dnf install exiv2 exiv2-devel
      

     cd
     test -d bin || mkdir bin
     cd bin
     ln -s /usr/bin/qmake-qt5 qmake
     ln -s /usr/bin/lrelease-qt5 lrelease

NB: If previous "symbolic link" (to earlier Qt, e.g. Qt3 and Qt4, exists, please remove them (e.g. sudo rm qmake) and relink again (e.g. ln -s /usr/bin/qmake-qt5 qmake)


Editing Header files (cDeviceModelDef.h & -EncodeVideo.cpp)

NB: Prior to install "ffDiaporama.zip" if you r using ffmpeg 2.8.7 (or above, which i believe applicable to higher version)

#define RESAMPLE_MAX_CHANNELS SWR_CH_MAX
to
    #define RESAMPLE_MAX_CHANNELS 32

in cDeviceModelDef.h

Add in
   VideoStream->time_base                  = VideoFrameRate;  
 //ffmpeg 2.8.7 and above
right after the line
   VideoStream->codec->time_base           = VideoFrameRate;
in _EncodeVideo.cpp.

Installing ffDiaporama


NB: Do install ffDiaporama Resource before ffDiaporama Main. After installing ffDiaporama Main, you may proceed to install plugin like Texturemate and Openclipart.

Installing ffDiaporama Resource (ffdiaporama_rsc_2.2.devel.2014.0503.tar.gz)

1) Extract the file in your preferred workspace.
2) Compilation:
     qmake /PREFIX=/usr -o Makefile ffDiaporama_rsc.pro
     make
3) Installation:
     sudo make install

Installing ffDiaporama Main (ffdiaporama_bin_2.2.devel.2014.0701.tar.gz)

1) Extract the file in your preferred workspace.
2) Compilation:
     qmake ffDiaporama.pro /PREFIX=/usr
     make
3) Installation:
     sudo make install

Installing ffDiaporama Texturemate 
(ffdiaporama_texturemate_1.0.2014.0125.tar.gz)

1) Extract the file in your preferred workspace.
2) Compilation:
     qmake ffDiaporama_texturemate.pro CONFIG+=release
     make

3) Installation:
     sudo make install


 Installing ffDiaporama Openclipart
1) sudo dnf install openclipart

Happy making your Video Presentation on Fedora 23!


Follow my blog with Bloglovin

Sunday, 15 May 2016

Using LibreOffice to insert a ticked box

Operating System: Linux Mint Debian Edition
LibreOffice: 4.3.3.2

Insert> Special Characters> OpenSymbol>Select U+E531


Follow my blog with Bloglovin

Thursday, 12 May 2016

Thumbdrive and Oracle VirtualBox

Safe Removal of Hdd/Thumbdrive

Safely remove Hdd/Thumbdrive on Linux Mint Debian Edition

Sometimes the eject option is not available to safely remove a external storage device, the way to do it manually is to issue the following command:
udisks --detach /dev/sd*


Installing Oracle VirtualBox


Resolving gpg-keyserver error updating VirtualBox

Advice: follow the instruction on https://www.virtualbox.org/wiki/Linux_Downloads to update the repository list in your /etc/apt/sources.list

NB: An error likely to surface when updating Oracle VirtualBox on Debian-based distribution (including Ubuntu):  "Error! Could not locate dkms.conf file.
File: does not exist."


1) Simply delete the previous version folder in /var/lib/dkms/vboxhost/ for e.g. (/var/lib/dkms/vboxhost/5.X.XX)

2) issue the command "sudo /etc/init.d/vboxdrv setup" and the error is gone.


< Follow my blog with Bloglovin


Saturday, 30 April 2016

Checking your harddisk using smartctl or hdparm

This short tip is to check your harddisk to check if it is active or in standby mode using smartctl  command:

 sudo smartctl -i -n standby /dev/sdx

Note:
x = a letter representing the device you are checking

Update: In addition, the following command helps using hdparm which should works if your drive is in 'sleep' state without waking the drive:

sudo hdparm -C /dev/sdx

Happy holidays!


Follow my blog with Bloglovin

Wednesday, 13 April 2016

History is to be corrected Arduino & Wiring

I support Wiring for its modern approach to teaching schoolchildren the basics of computing.

It is a shame that Arduino has appropriated the ideas of Wiring.

The purpose of writing this post is to lend support to Hernando Barragán the original creator of concepts behind Arduino.

Full Story can be read here :  http://arduinohistory.github.io/#what-is-programma2003-and-how-is-it-related-to-you-or-to-wiring

Follow my blog with Bloglovin

Wednesday, 2 March 2016

Backing up the stock partitions of Android Kindle Fire HD 7 (codenamed Tate)

This article is about installing TWRP on Kindle Tate and still use your stock ROM using Android SDK and with TWRP 2.8.7.


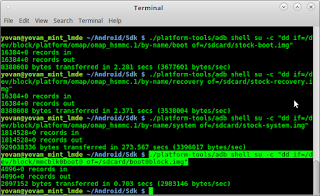
Using the following commands after going to /path/to/Android/Sdk folder:

./platform-tools/adb shell su -c "dd if=/dev/block/mmcblk0boot0 of=/sdcard/boot0block.img"

./platform-tools/adb shell su -c "dd if=/dev/block/platform/omap/omap_hsmmc.1/by-name/boot of=/sdcard/stock-boot.img"

 ./platform-tools/adb shell su -c "dd if=/dev/block/platform/omap/omap_hsmmc.1/by-name/recovery of=/sdcard/stock-recovery.img"

./platform-tools/adb shell su -c "dd if=/dev/block/platform/omap/omap_hsmmc.1/by-name/system of=/sdcard/stock-system.img"

We can verify the system integrity of my Kindle Fire 7 HD (in this article aka Kindle Tate).


Next, we can proceed to backup the partitions with the following commands:
./platform-tools/adb pull /sdcard/boot0block.img

./platform-tools/adb pull /sdcard/stock-boot.img

./platform-tools/adb pull /sdcard/stock-recovery.img

 ./platform-tools/adb pull /sdcard/stock-system.img

Prequisite to move to the next step: !) A Factory Cable (A Factory Cable is used to set Kindle Tate in Fastboot mode).

Proceed to install the bootloader by downloading the files comprising stack override file, TWRP 2.8.7.0 recovery image, kfhd7-freedom-boot-7.4.6.img, older 7.2.3 bootloader file posted here (http://forum.xda-developers.com/showthread.php?t=2128848). 

As iused the adb tool in Android Studio, i proceed to have the downloaded files placed in /path/to/Android/SDK folder and proceed to install stack override in Kindle Tate's /system:

./platform-tools/adb push stack /sdcard/

./platform-tools/adb shell su -c "dd if=/sdcard/stack of=/dev/block/platform/omap/omap_hsmmc.1/by-name/system bs=6519488 seek=1" 

Deactivate the original recovery update script in Kindle Tate:
./platform-tools/adb shell su -c "mount -o remount,rw ext4 /system"

./platform-tools/adb shell su -c "mv /system/etc/install-recovery.sh /system/etc/install-recovery.sh.bak"
 

./platform-tools/adb shell su -c "mount -o remount,ro ext4 /system"

Now, we are ready to proceed to install Teamwin Recovery Project on Kindle Tate. We unplug and turn off Kindle Tate and connect Kindle Tate back to the computer with a Factory Cable to put Kindle Tate in fastboot mode.

In Linux (in particular, Debian and Ubuntu), we can proceed to do md5sum check on the downloaded files. This is to ensure file integrity prior to flashing the files (namely bootloader kfhd7-u-boot-prod-7.2.3.bin, boot kfhd7-freedom-boot-7.4.6.img, flash recovery kfhd7-twrp-2.8.7.0-recovery.img)


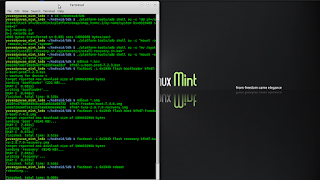
We flash each file in the order of the command below one by one:

fastboot -i 0x1949 flash bootloader kfhd7-u-boot-prod-7.2.3.bin
 

fastboot -i 0x1949 flash boot kfhd7-freedom-boot-7.4.6.img
 

fastboot -i 0x1949 flash recovery kfhd7-twrp-2.8.7.0-recovery.img
 

fastboot -i 0x1949 reboot

After going through the painstaking steps above, we may proceed to make major modifications on Kindle Tate. (Proceed with caution)

Above credits fully goes to the developer with nickname Hashcode on XDA Developers.
Follow my blog with Bloglovin

Tuesday, 23 February 2016

Defragging HDD Drive in Linux/GNU OS

One of the stable FOSS program for defragging Linux/GNU driven hard drive and formatted with the common FS like ext2/3/4 is defragfs.

Download and extract the zip file and copy the "defragfs" perl script file to /usr/local/bin.

The command to use:

cd /usr/local/bin
sudo perl ./defragfs /path/you/want/defrag

An example is the following defragmentation of a activated drive on my PC.

Follow my blog with Bloglovin

Experimenting with Archlinux on Legacy Bios system

nano /etc/wpa_suppplicant/wpa_supplicant.conf    ctrl_interface=/run/wpa_supplicant    update_config=1 wpa_supplicant -B -i wlan0 -c /e...